| |
The Rennovate screen gives you access to all of the really useful functions you can do to alter the appearance and layout of your dungeon.
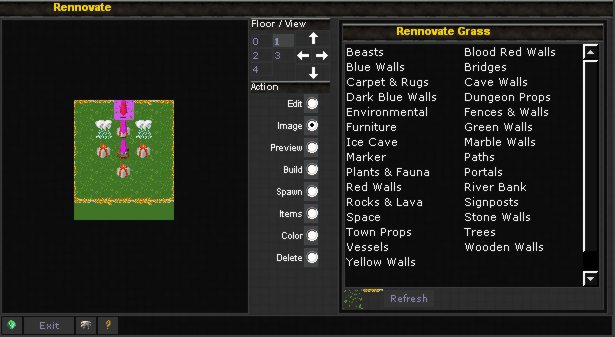
You can use the number buttons to switch between floors in the Rennovate view and the Arrow buttons to move the view window around the available floor plan.
The Action toggles in the middle of the screen are used to determine what action you wish to perform, you select an action and then click on the Room in the building, and the area on the right of the screen will display the relevant action screen.
| Edit |
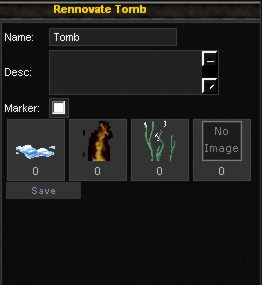 | This screen allows you to edit the room description and name it also lets you turn on the rooms marker, a room marker is basically a jumping up and down pink arrow which is used as a visual indicator that there might be something important in this room such as an NPC.
When you are done click on the Save button to save the changes. |
| Image |
This screen allows you to edit the room images. If this is the first time you have used the tool it will usually prompt you for a category, all of the images are stored in categories, so you need to pick the appropriate category.
After picking a category it will display all of the images in this category, you can then select the images you wish to use.
Each room has 2 image layers, layer 1 and layer 2. Layer 2 is displayed ontop of layer 1 so we can consider layer 1 the background and layer 2 the foreground.
Use the Left mouse button to set the layer 1 image and the Right mouse button to set the layer 2 image.
When you are done click on the Save button to save the changes or the Back button to go back to choose another category. | 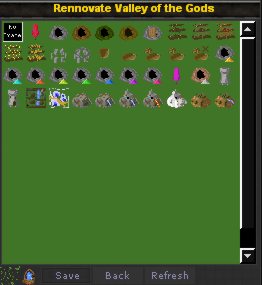 |
| Preview |
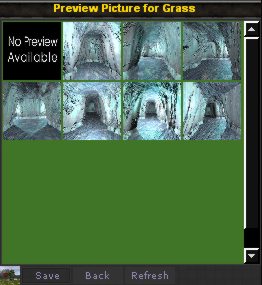 | This screen allows you to edit the room preview image. If this is the first time you have used the tool it will usually prompt you for a category, all of the preview images are stored in categories, so you need to pick the appropriate category.
After picking a category it will display all of the preview images in this category, you can then select the images you wish to use.
Each room has 1 preview image layer.
Use the Left mouse button to set the preview layer.
When you are done click on the Save button to save the changes or the Back button to go back to choose another category. |
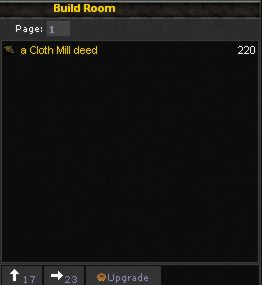
| Build |
This screen allows you to expand your dungeon by adding rooms onto it or by upgrading an existing toom to another type.
The screen works by loading a list of room deeds you have in your inventory, if you do not have any room deeds the screen will be blank.
Selet a room deed from the list (the selected deed is colored gold), then you have a choice of buttons
Upgrade
Upgrades the current room.
Build
If you clicked on tile without a room on it, then the only button you should see will be Build.
Arrows
There may be various arrow buttons on this screen, these allow you to build a room off the current room, i.e. if you select the north button the deed will be used to construct a dungeon room in a northerly direction.
The dungeon grid is 50 * 50 rooms with 5 floors allowing for over 1000 rooms if you so wish, although some Buildings have room limitations so it is not possible to get that many.
|  |
| Items |
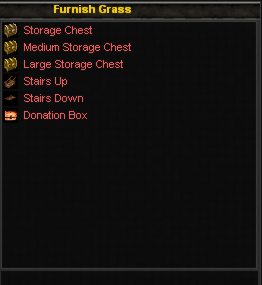 | This screen allows you to furnish your room with various items, most rooms allow for some standard items such as a Storage Chest, some types of rooms have a specific list of items that they can be fitted with.
To place an item you must first have it in your inventory, the majority of these items can be made with the Furnishing skill.
Some items can not be crafted, so in some cases this screen may let you place an item without you having the item this includes things like prize chests and traps. |
| Color |
| This screen allows you to change the room floor color, there is quite a list of colors to pick from and some of them match the outside terrain colors so you can make some quite varied room layouts. | 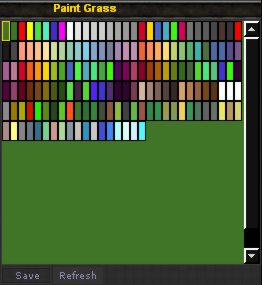 |
| Delete |
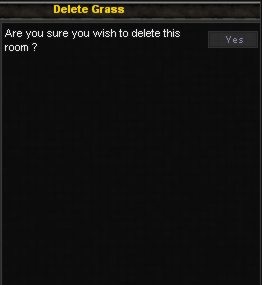 | This screen lets you delete rooms from your building, if you delete the entrance room then the entire dungeon is destroyed.
|
| | |
|


